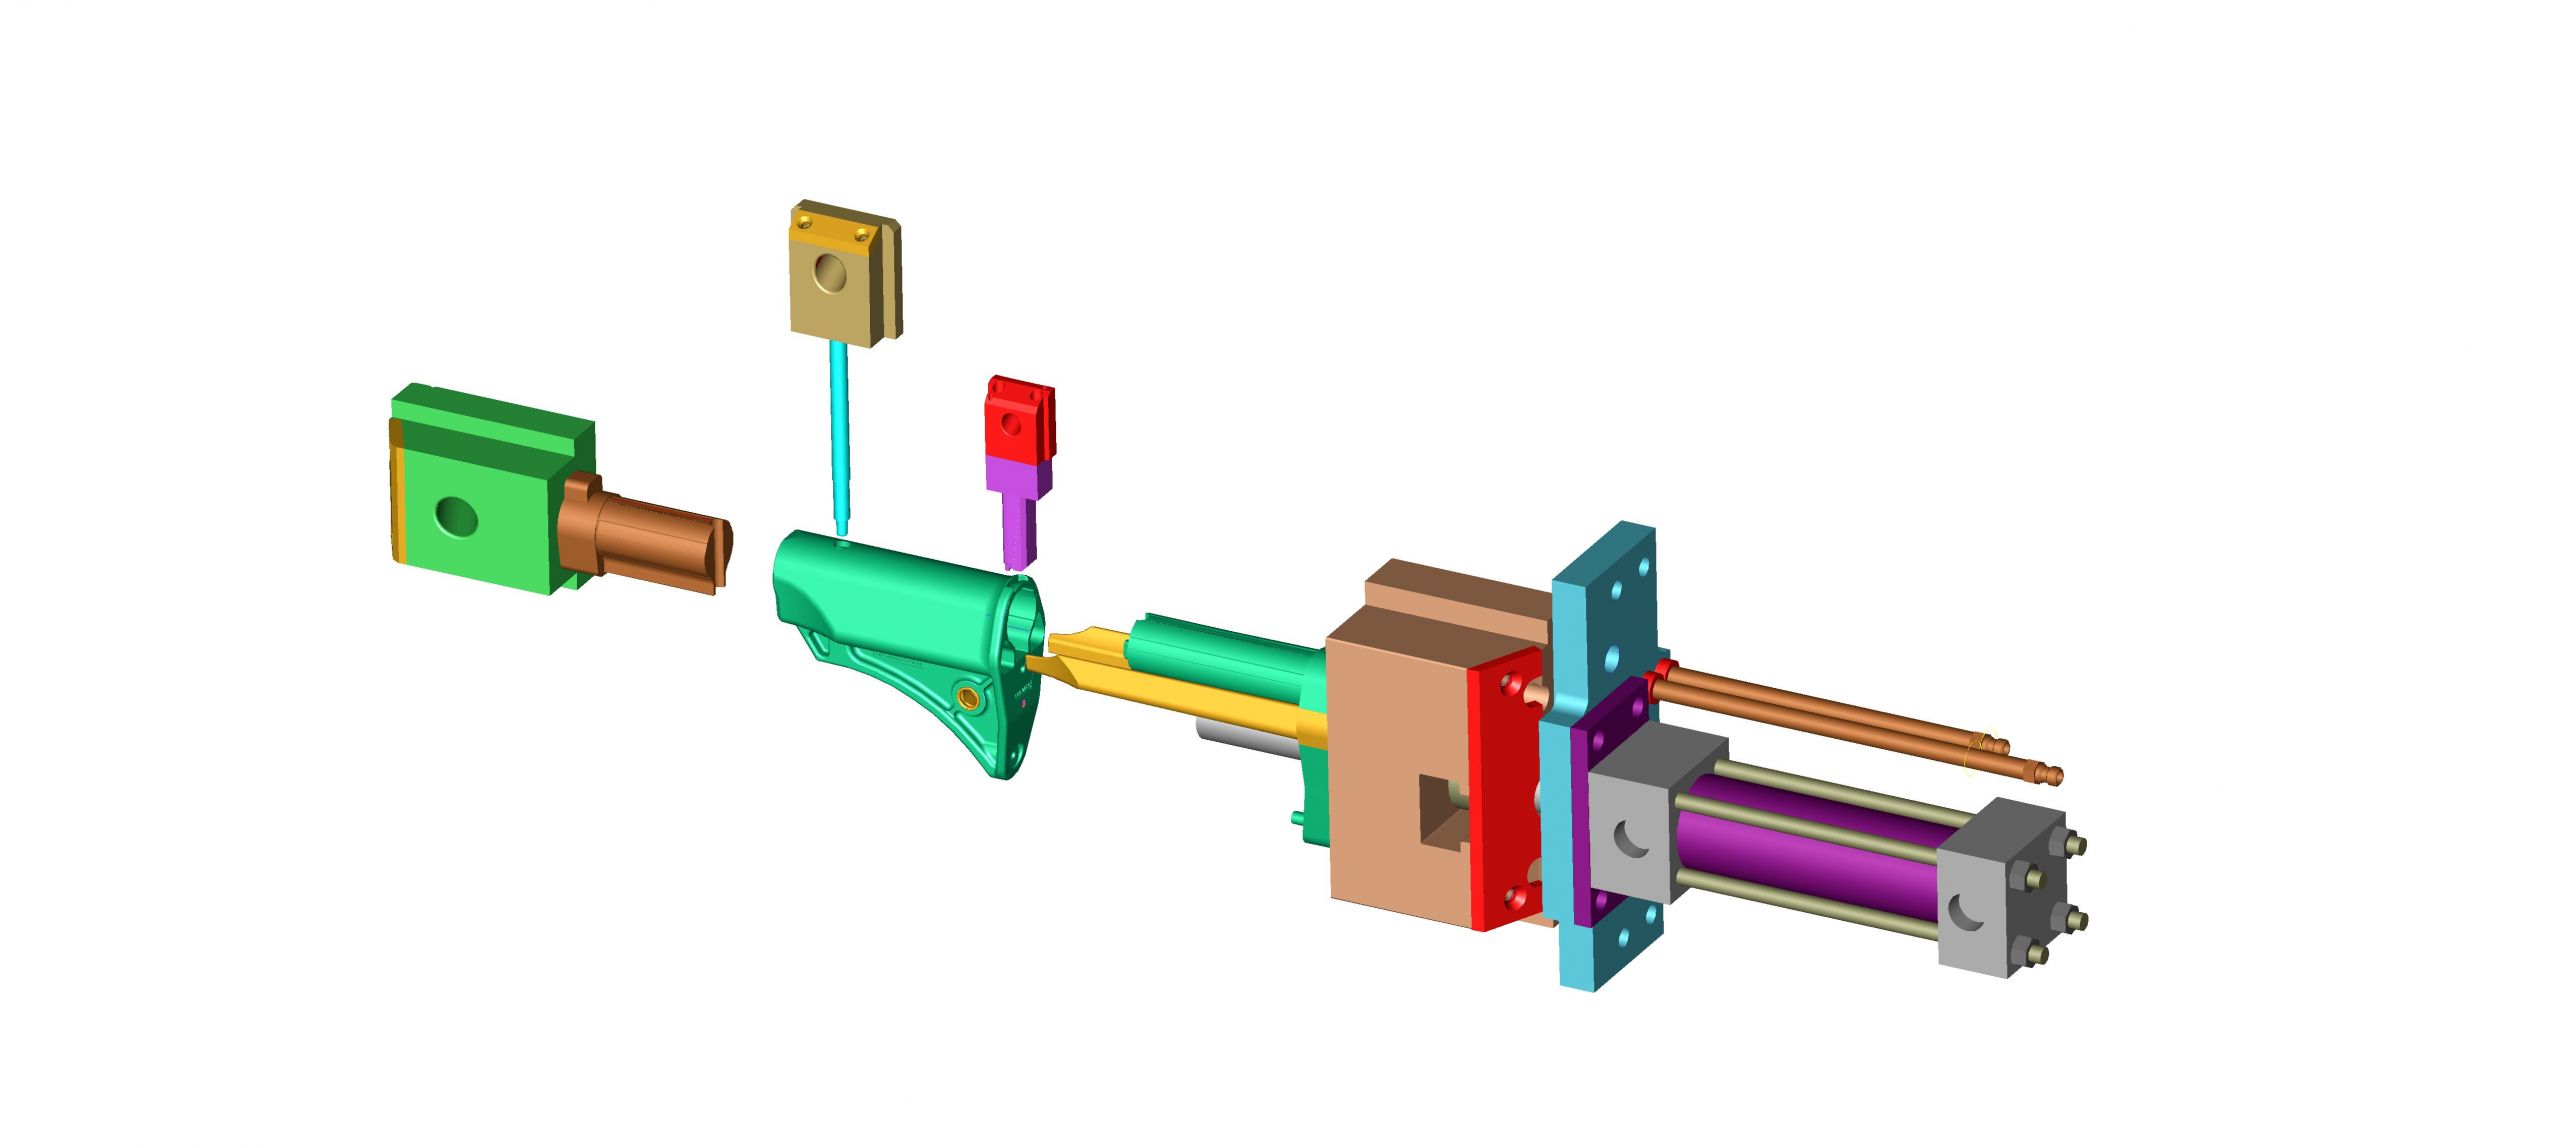
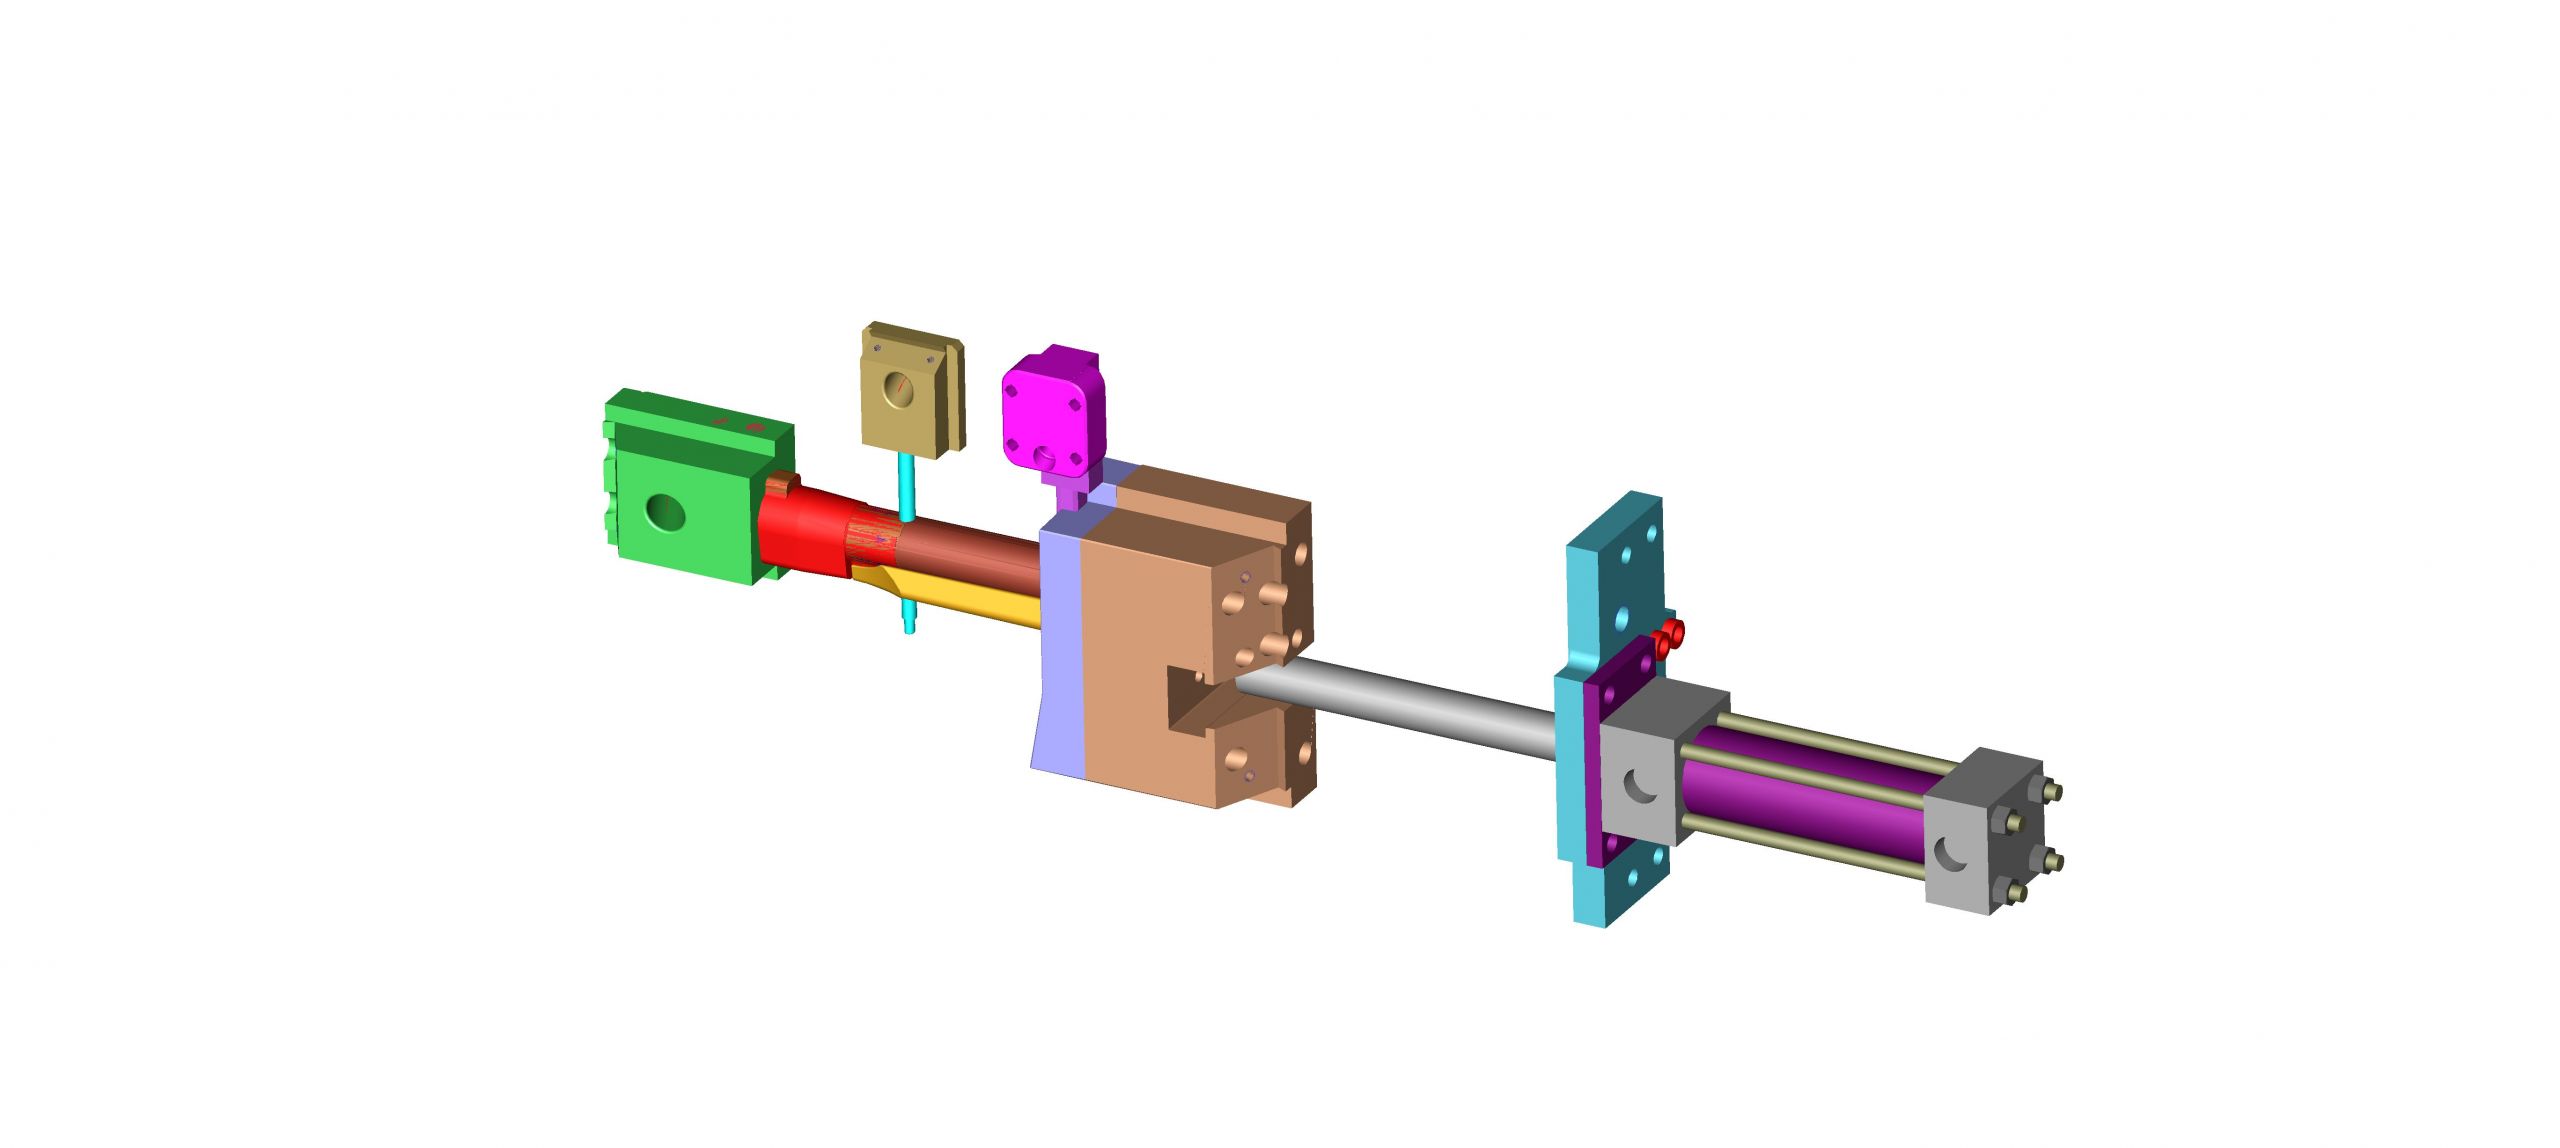
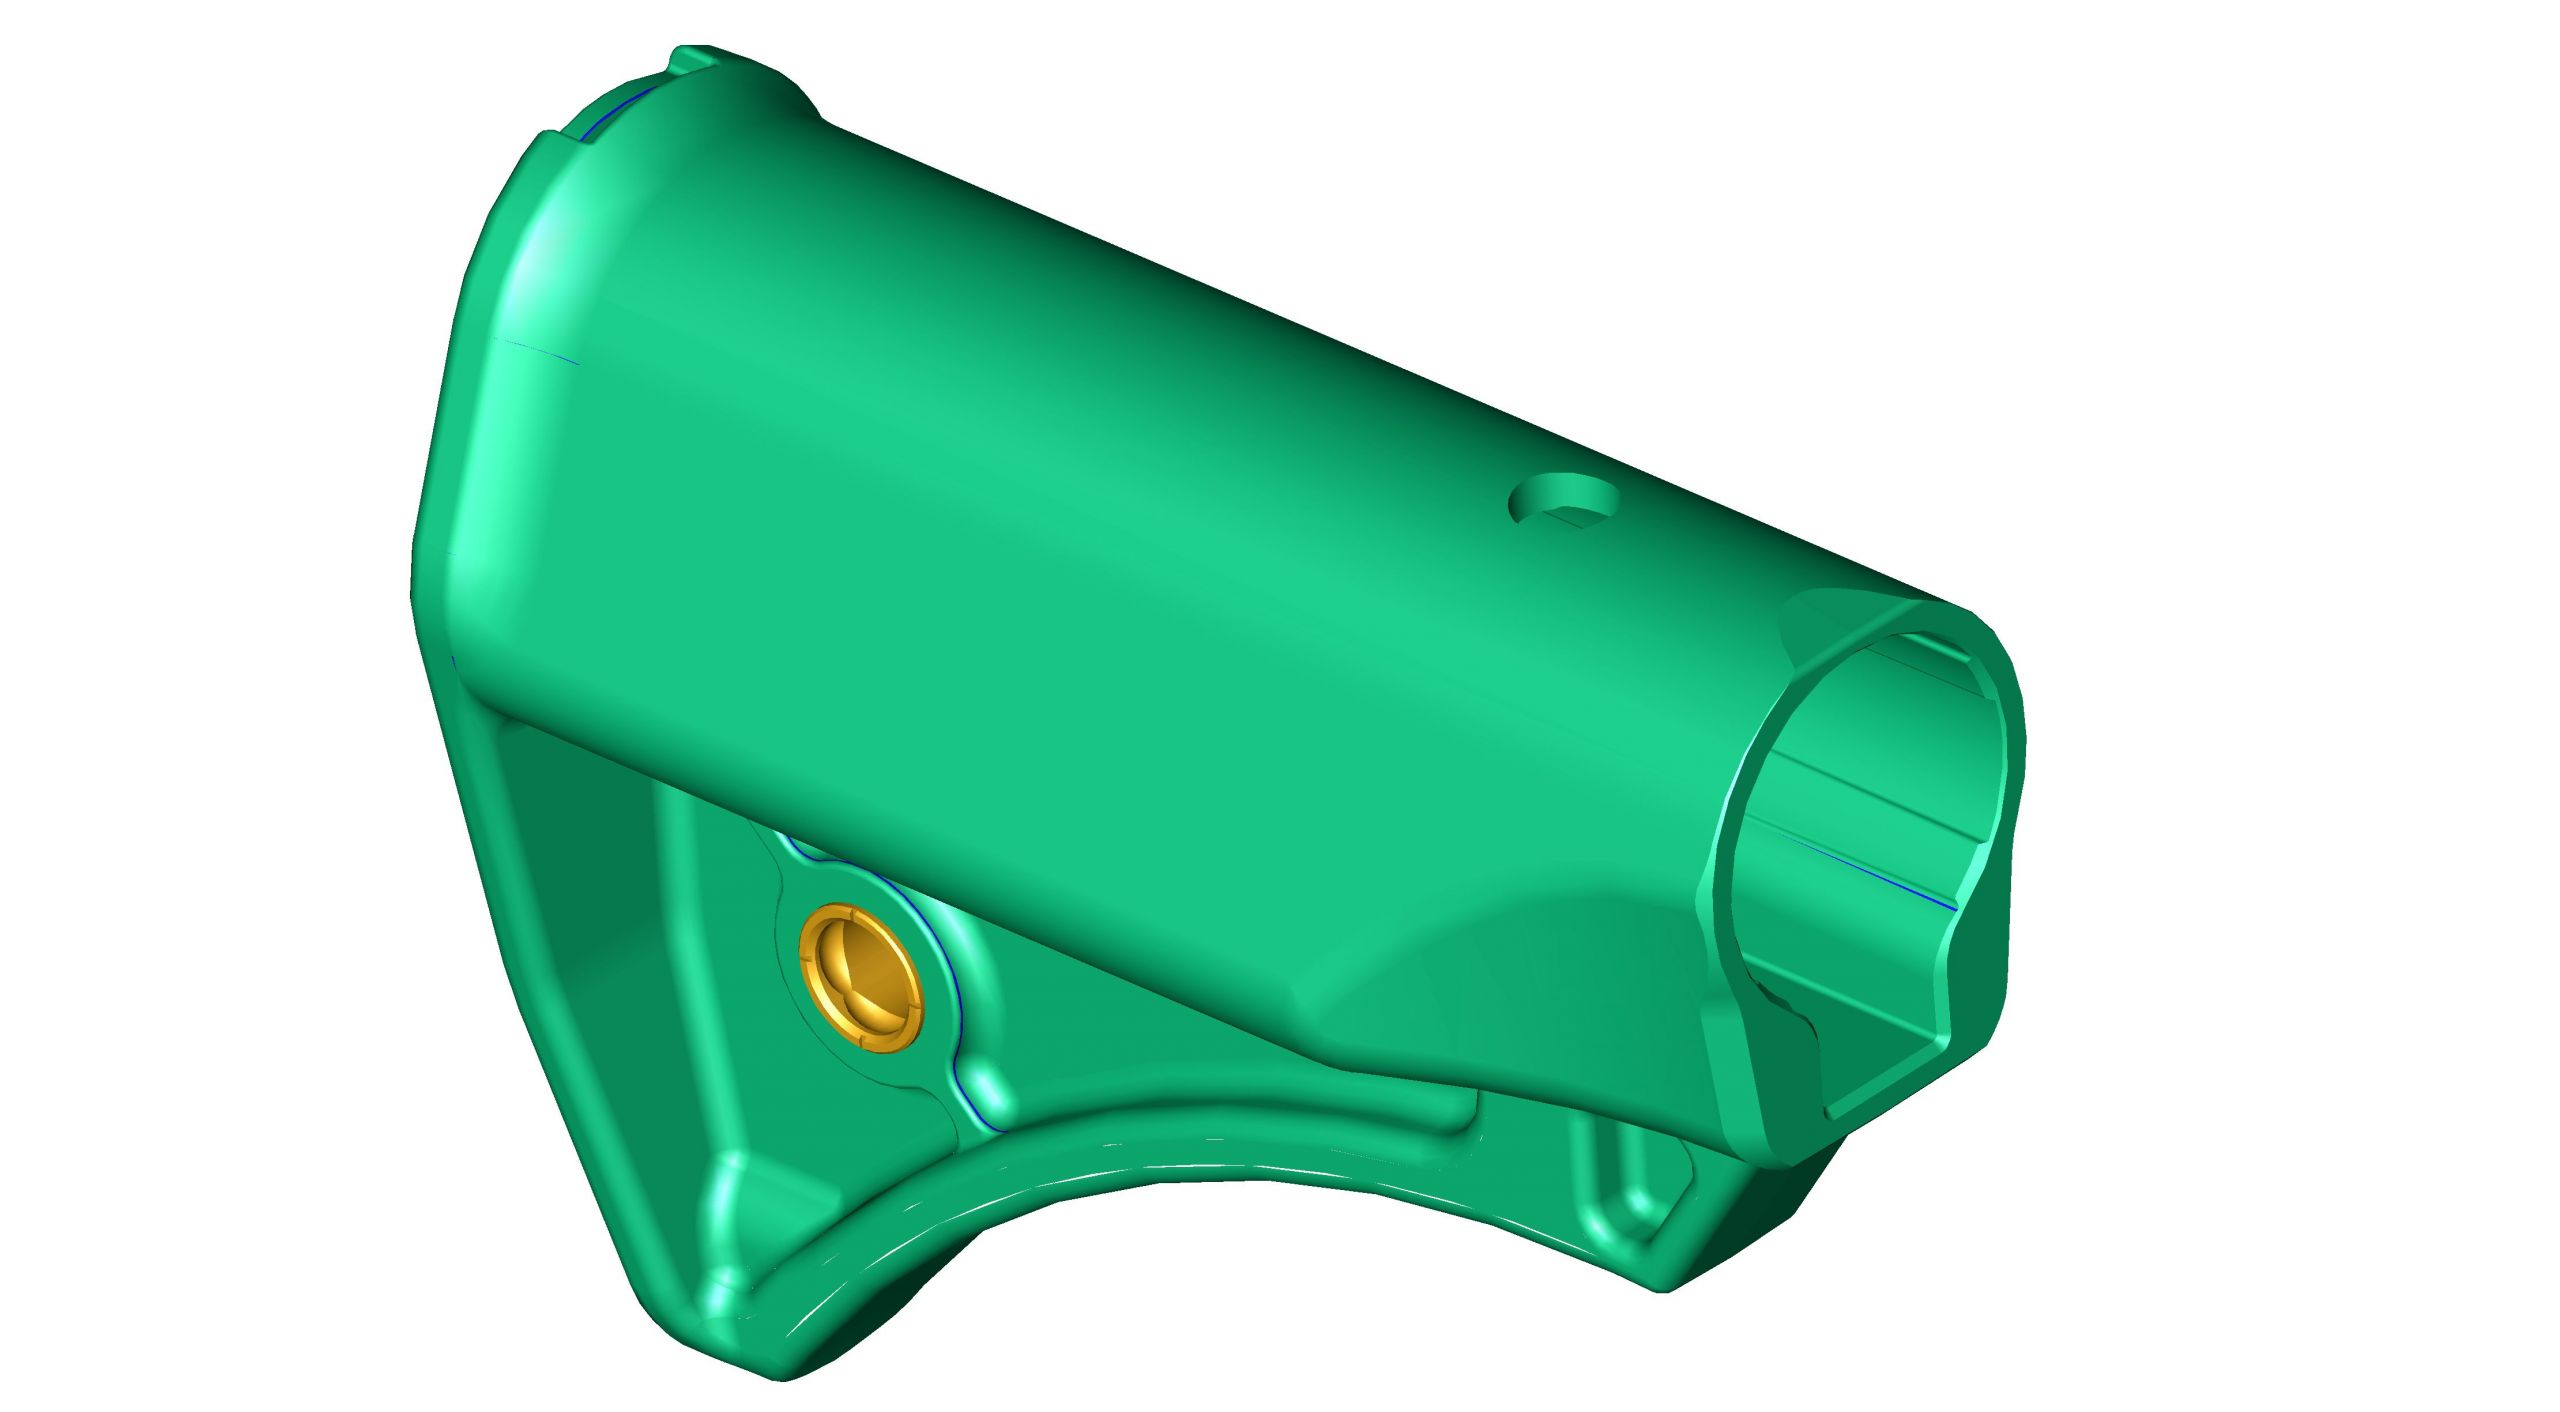
We built this mold for a large manufacturer in the defense sector. They came to us with a design, the mating components, and the intentions of use. With this, we were able to work through different design concepts for the mold.
There are many facets to part design. In the beginning stages, it’s important to make a plan and look at the entire program. In this case, we built a tool that will last hundreds of thousands of parts while still keeping within a budget. All while balancing piece price and quality expectations. The image below shows the actions used to create the part. There are three traditional slide actions, one hydraulic slide, and an over-molded insert.

The overmolded insert (the orange component in the first picture) is hand loaded by an operator. We decided in early discussions with our customer that hand loading was the best option. In this case, the initial cost of automation was not justified. This also gives the operator the time to inspect each part for quality and fitment.
We were able to work with our customer and look at the project as a whole to make it successful. This is the power of having mold design, mold building, and injection molding under one roof. Taking a project from design to finished product is what we do best.


